There’s nothing worse than picking up your phone and turning it on only to realize the notification it’s just received was probably supposed to have reached you 10 minutes (or, you know, hours) ago. Annoyingly, the root cause of this is frequently Android itself, trying to manage your phone’s battery life by forcing “low” priority apps to go to sleep, with the end result being those delayed notifications. Fortunately, Android does offer you the ability to configure this behavior on some level, on an app-by-app basis, so that you can be more confident that notifications will be received when they’re sent, not when your phone decides you should get them.
Fixing this is relatively simple, and though the Battery Optimization feature may seem a little confusing at first, it really is just a few quick steps to resolve this annoying issue.
Google and most other manufacturers
The below steps should work for most Android phones with Oreo (Android 8.0) or above. Some smartphone manufacturers, however, completely replace Android’s battery optimization for their own implementations.
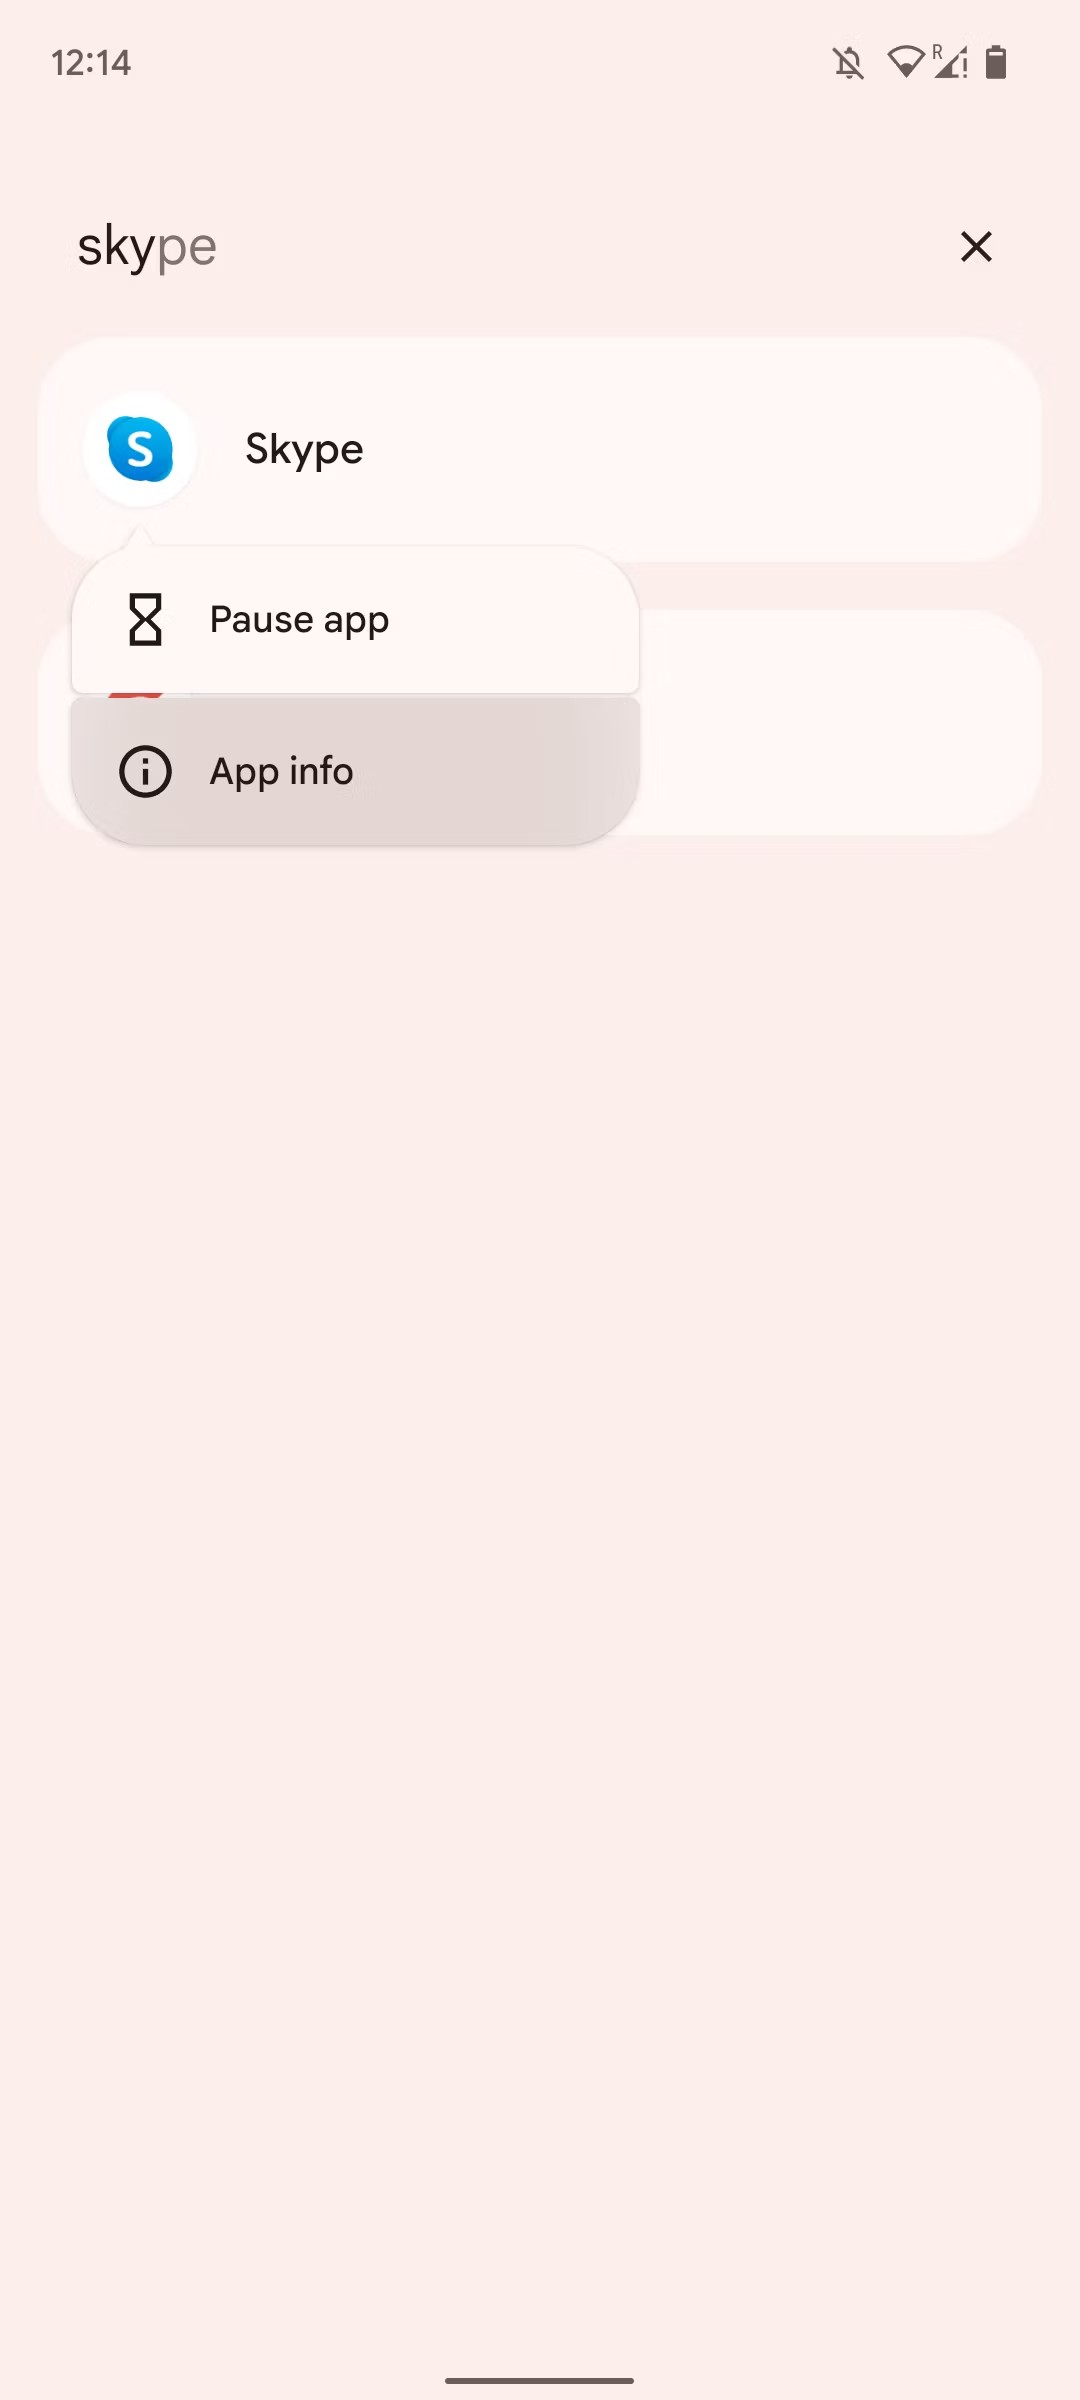
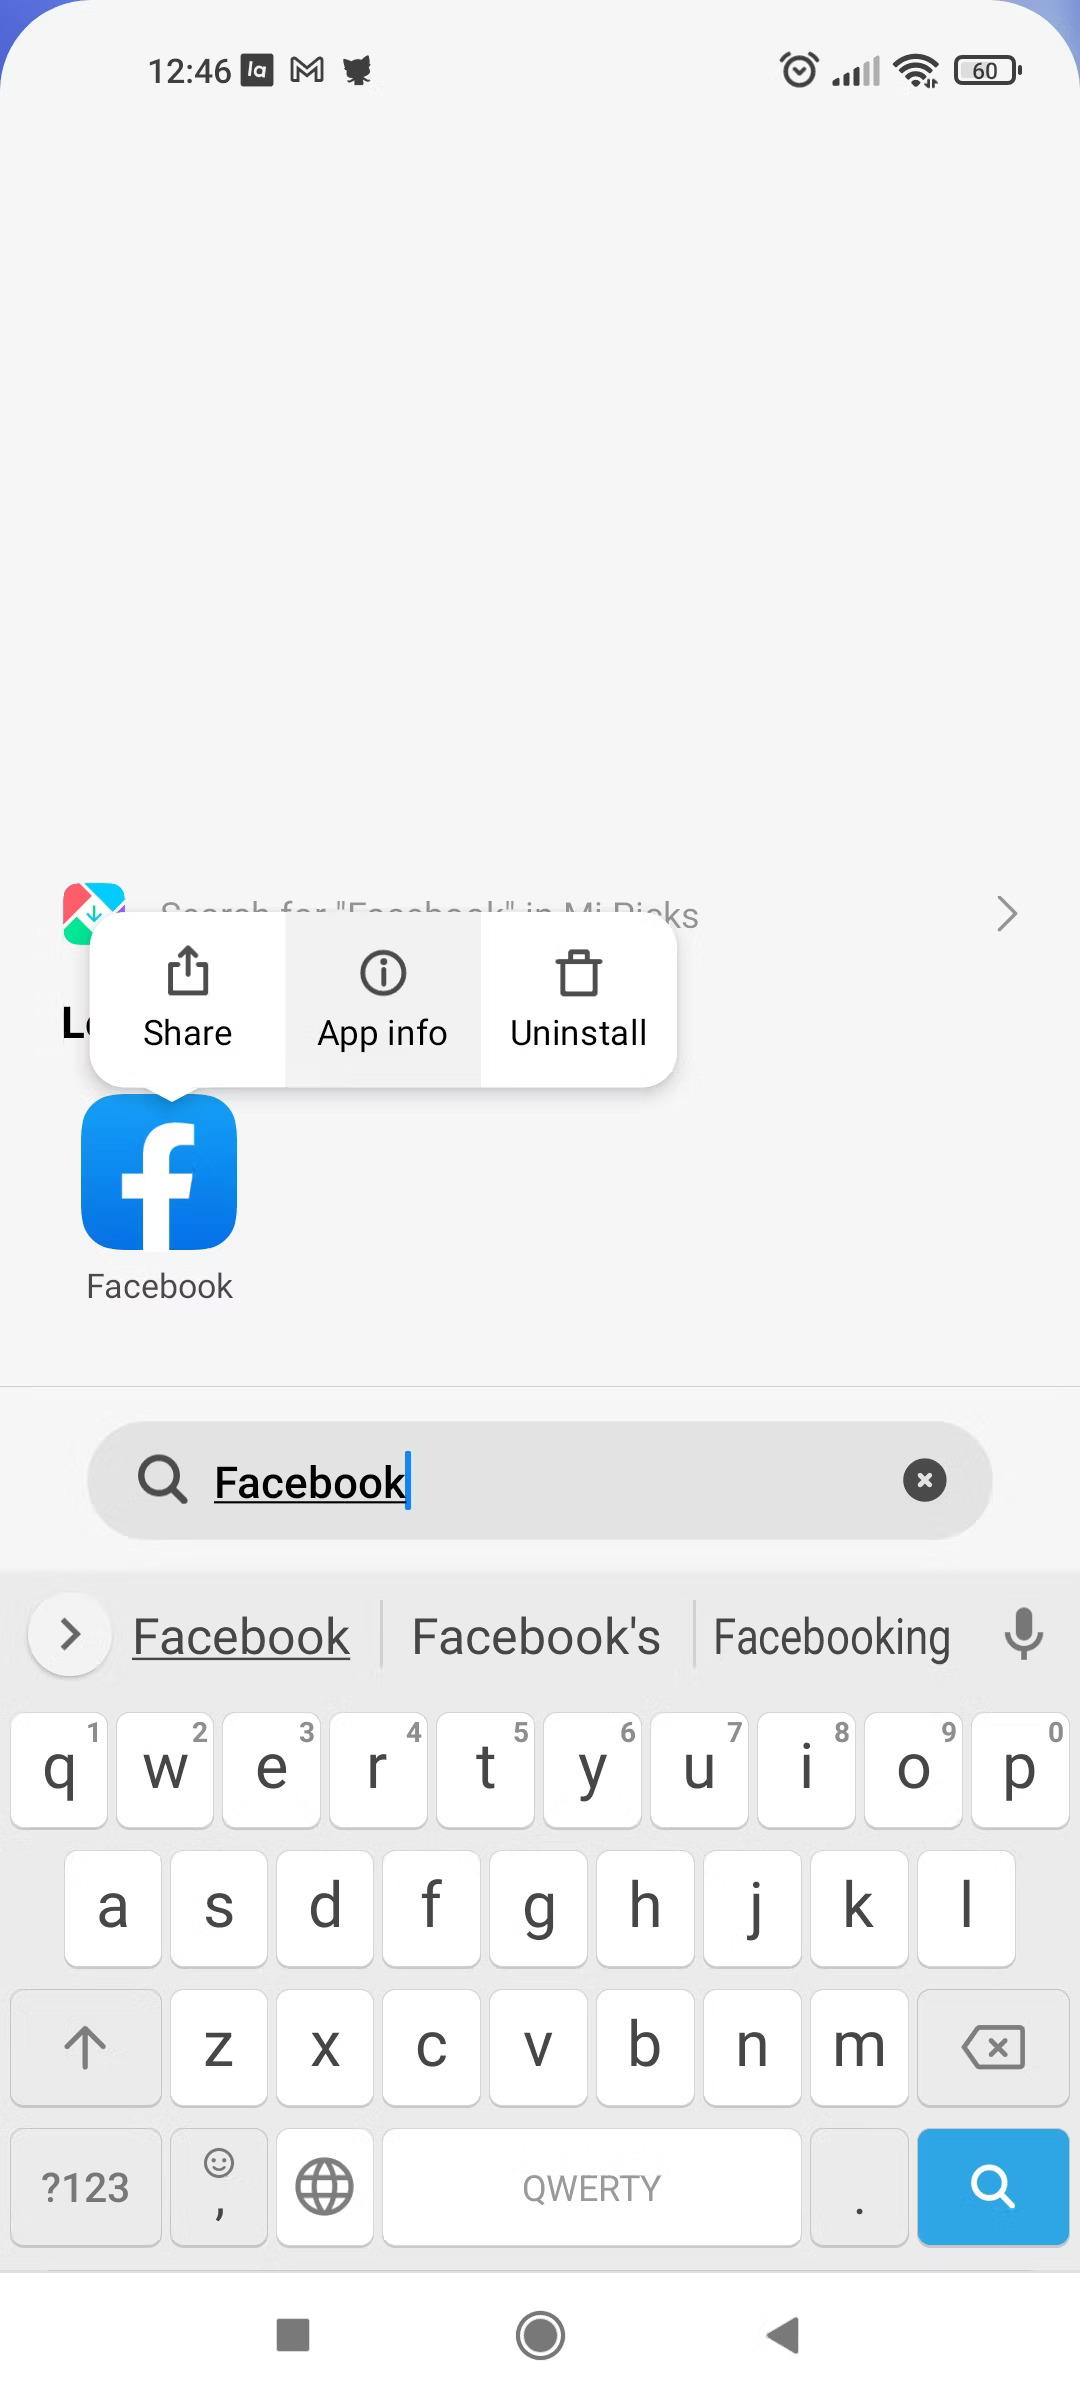
- Locate the app you want to work more reliably on your homescreen or launcher.
- Hold and tap it to invoke the long-press menu, and then select the App info shortcut (it should be an (i) symbol or something along those lines).
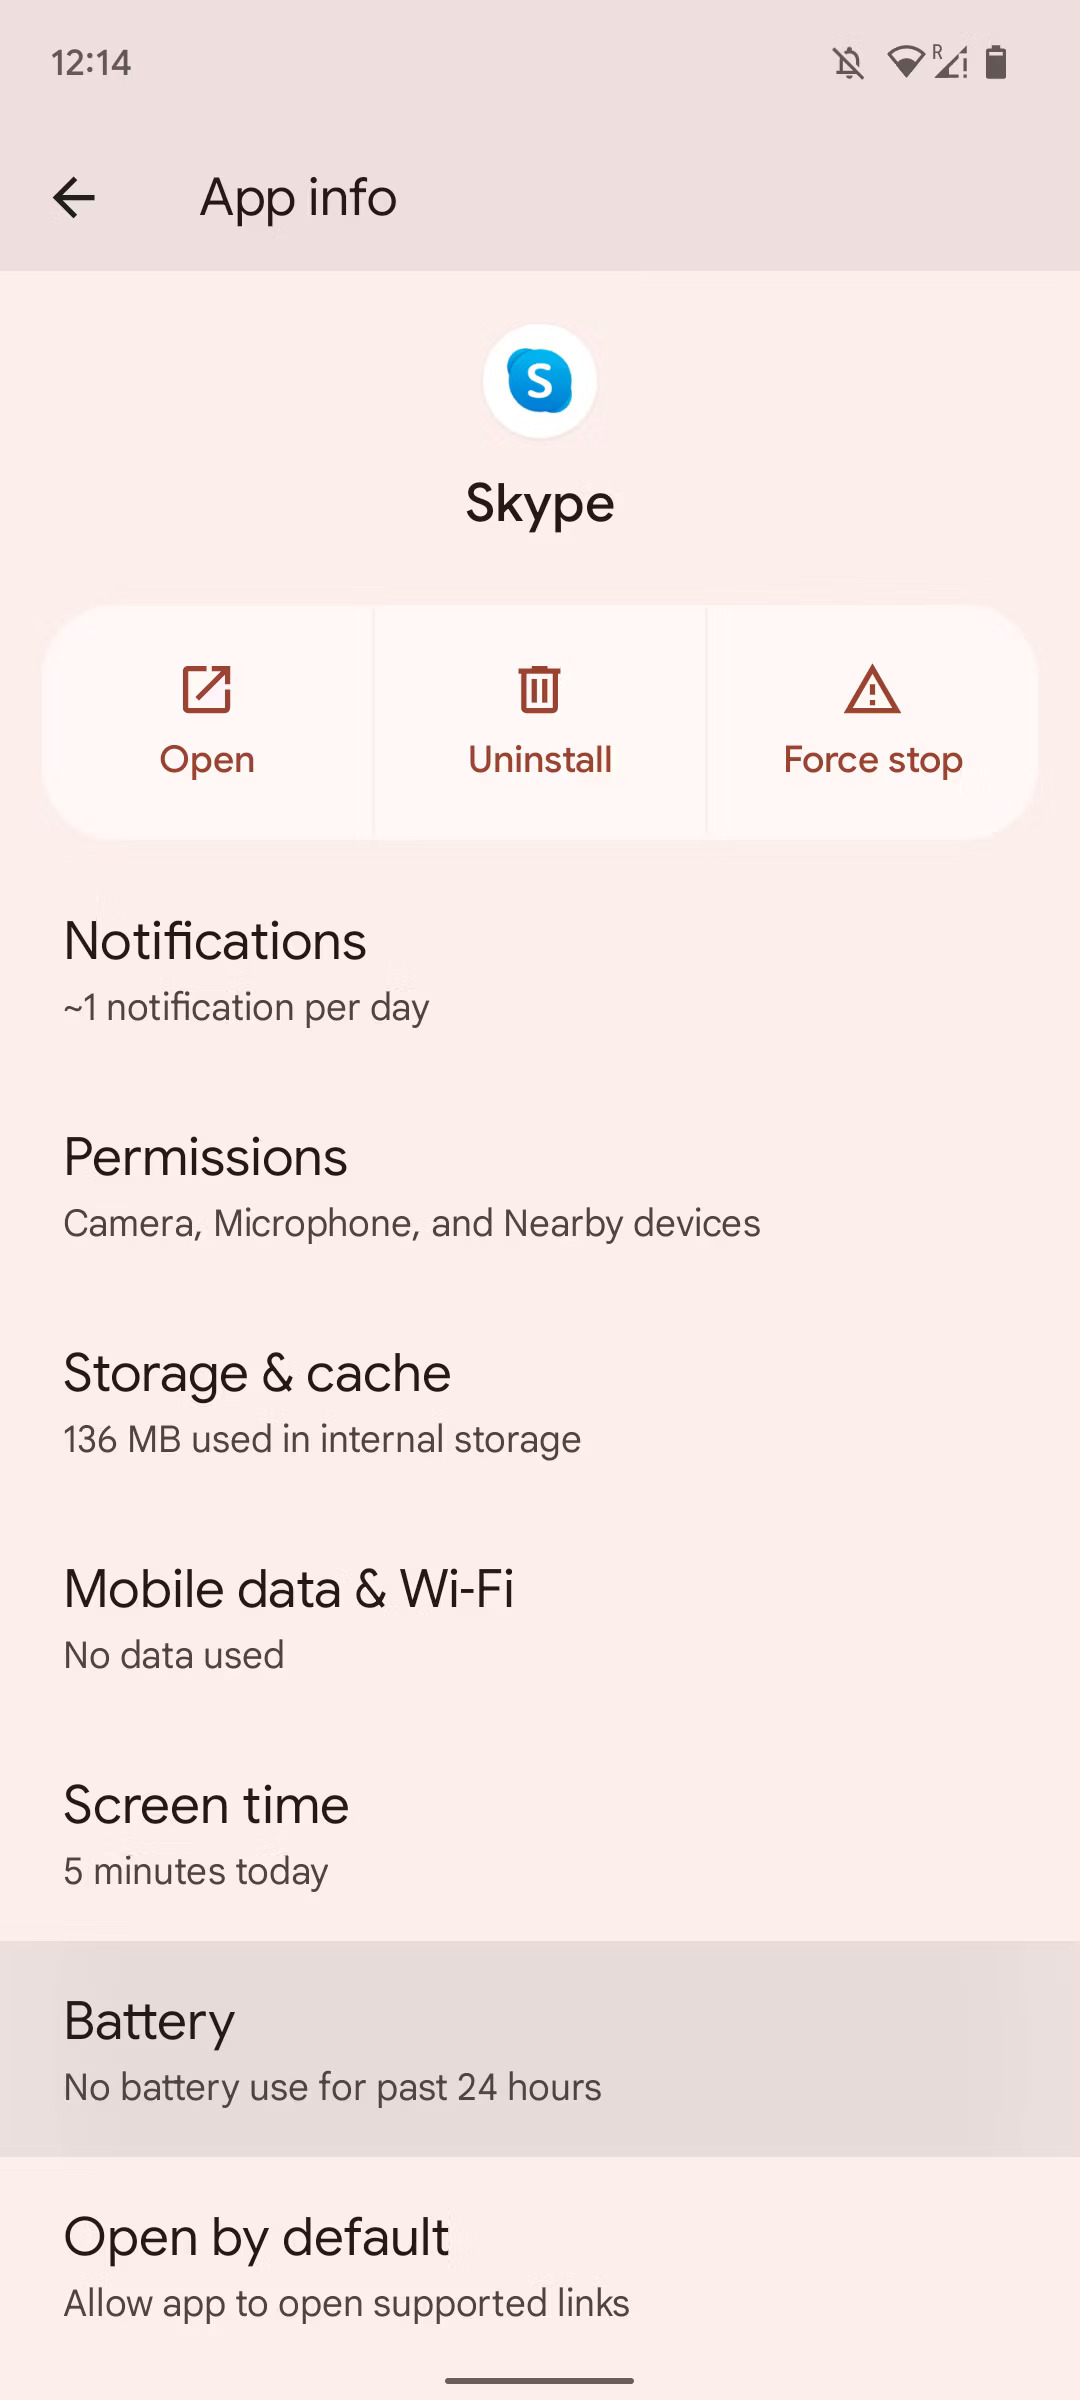
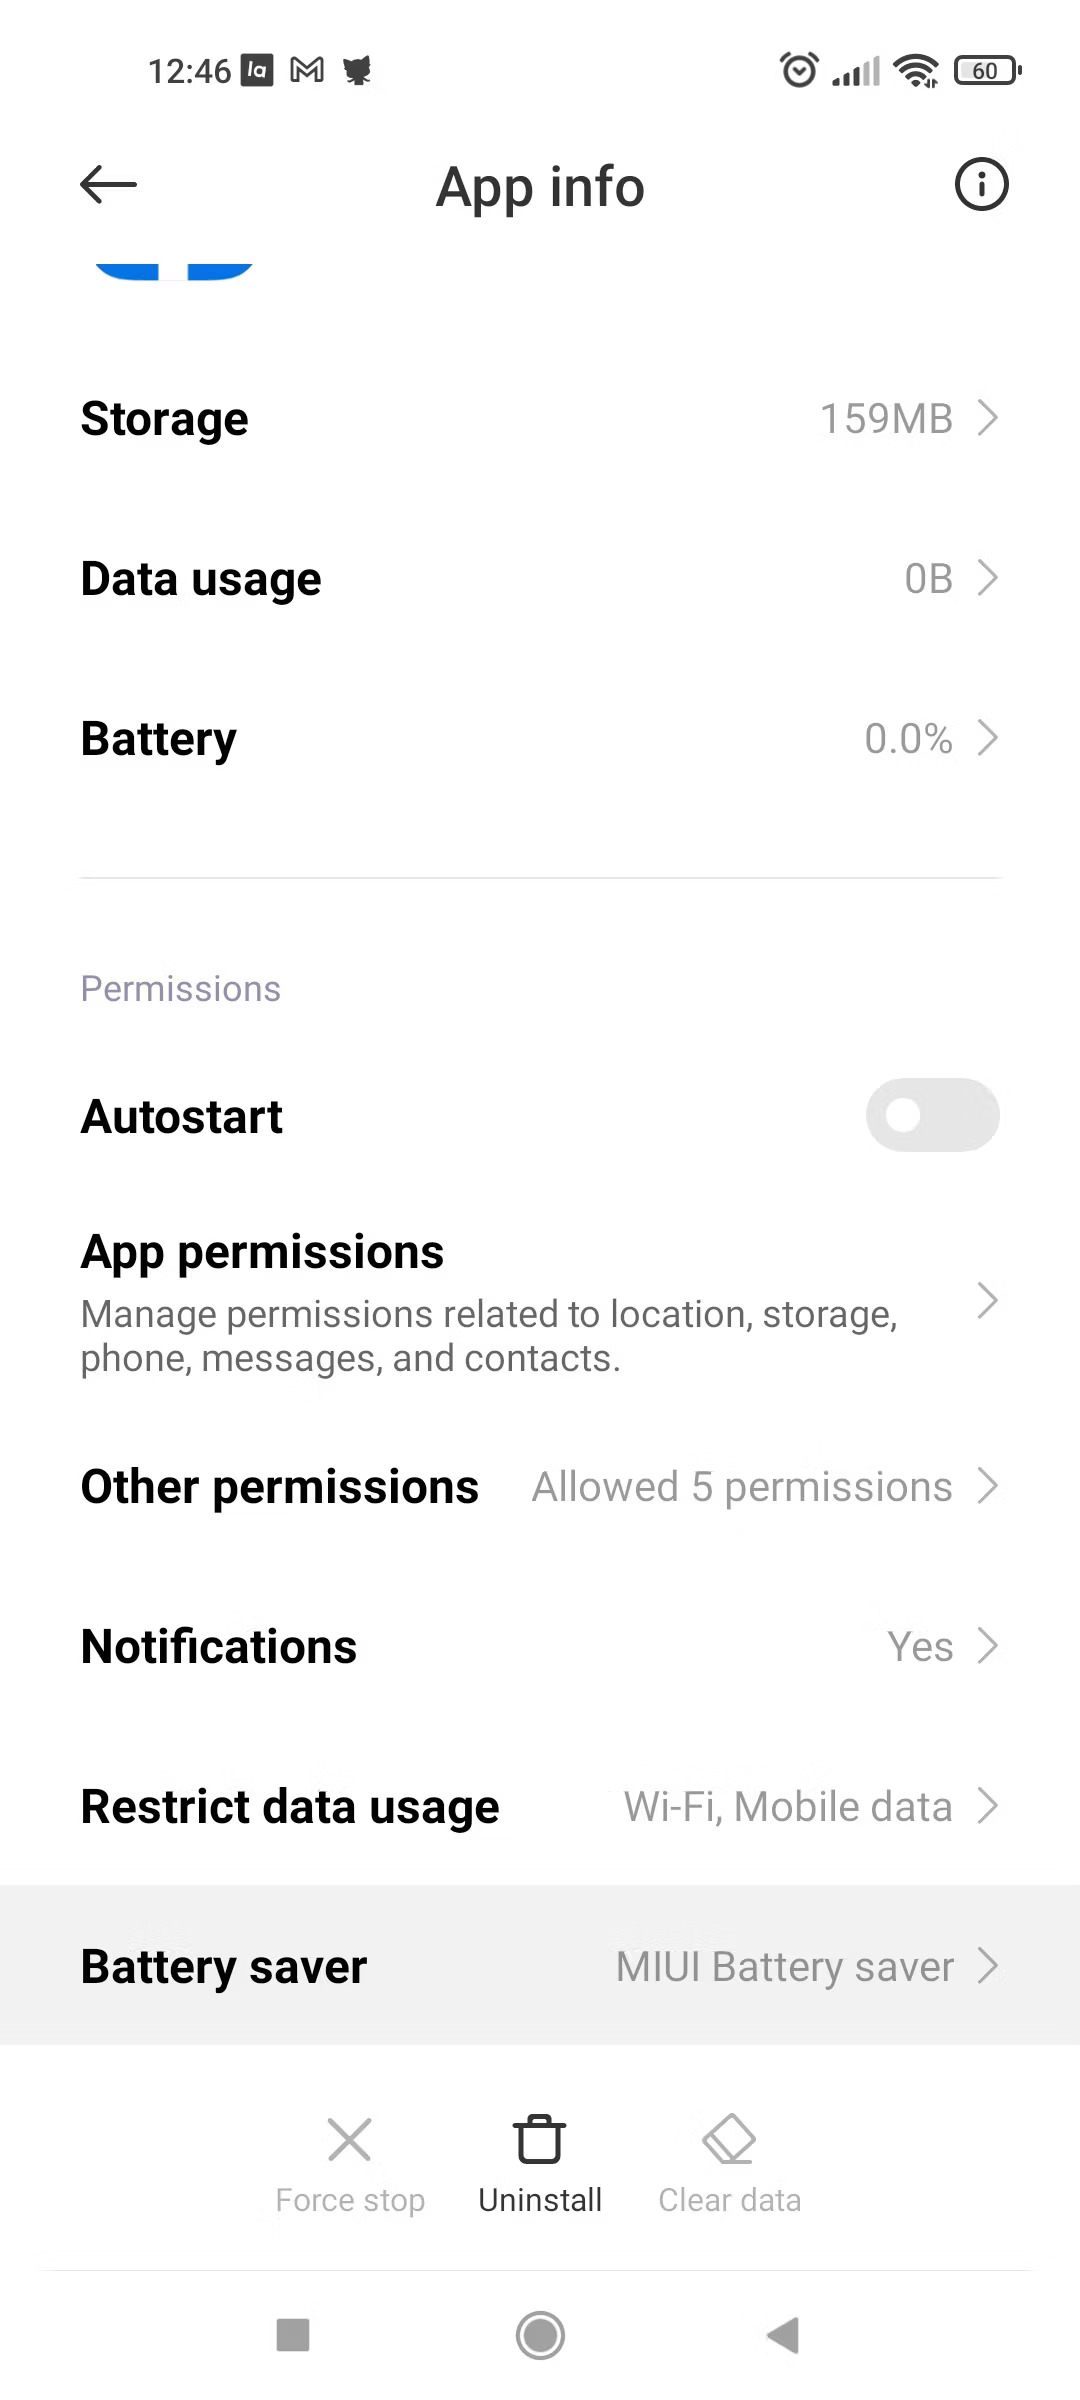
- Locate the Battery entry in the menu that just opened and tap it.
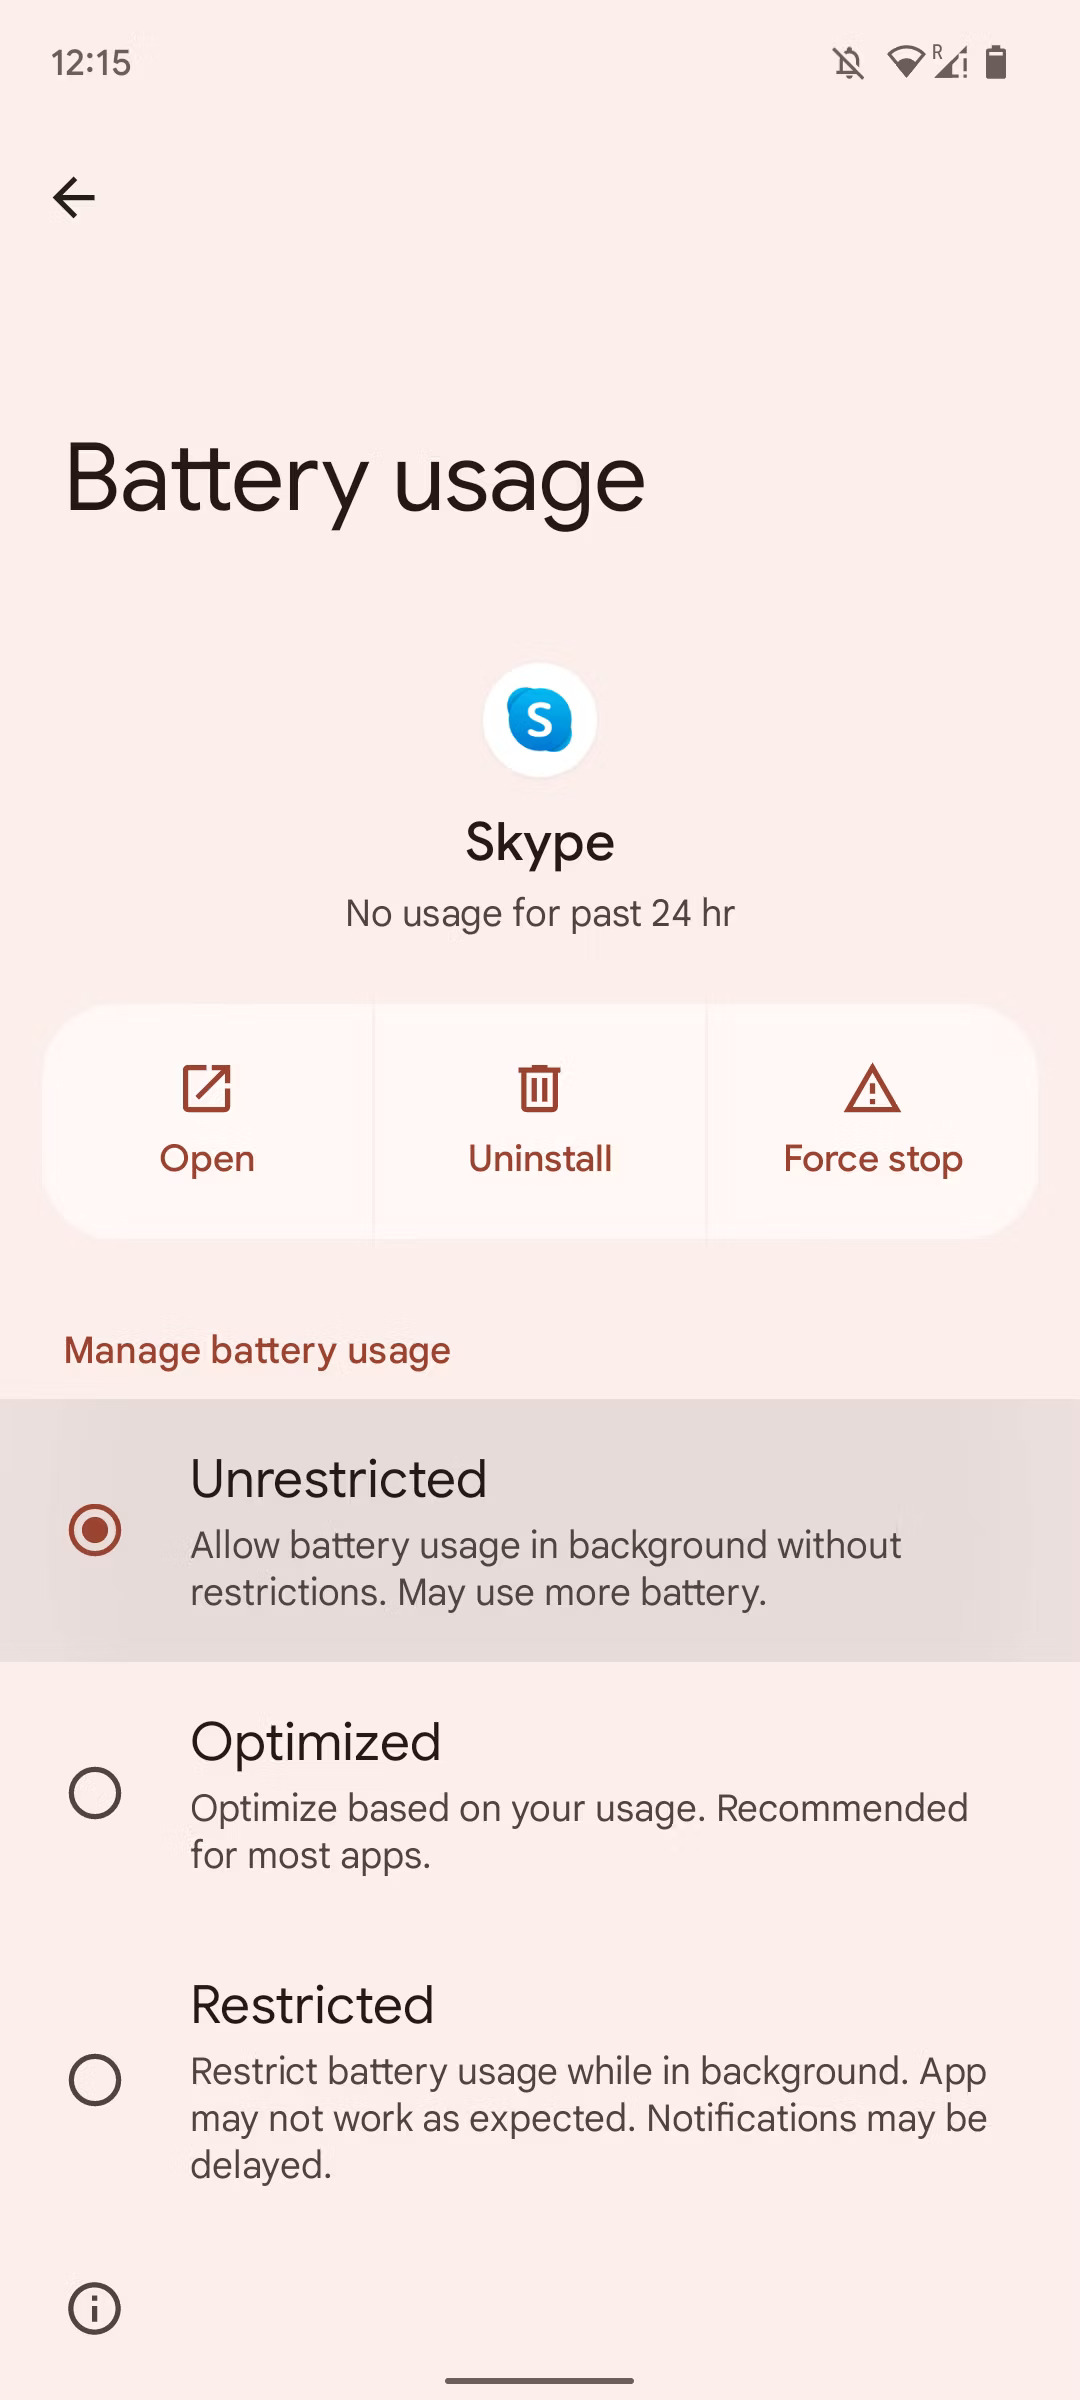
- On the next screen, select Unrestricted, which will allow the app in question to run with far fewer limits while in the background.
Samsung
If you have a Samsung device running One UI, Samsung provides another way to control sleeping background apps. It’s somewhat easier to use, and can supersede (but also kind of duplicate) the OS-level battery optimization setting. If you have a Samsung phone, make sure you’ve set this up as well as the above battery optimization setting to make sure an app doesn’t go to sleep. If you tell the Android OS not to optimize the battery life of an app, but not the Samsung settings, your phone may still put it to sleep.
- Follow the instructions given in the section above.
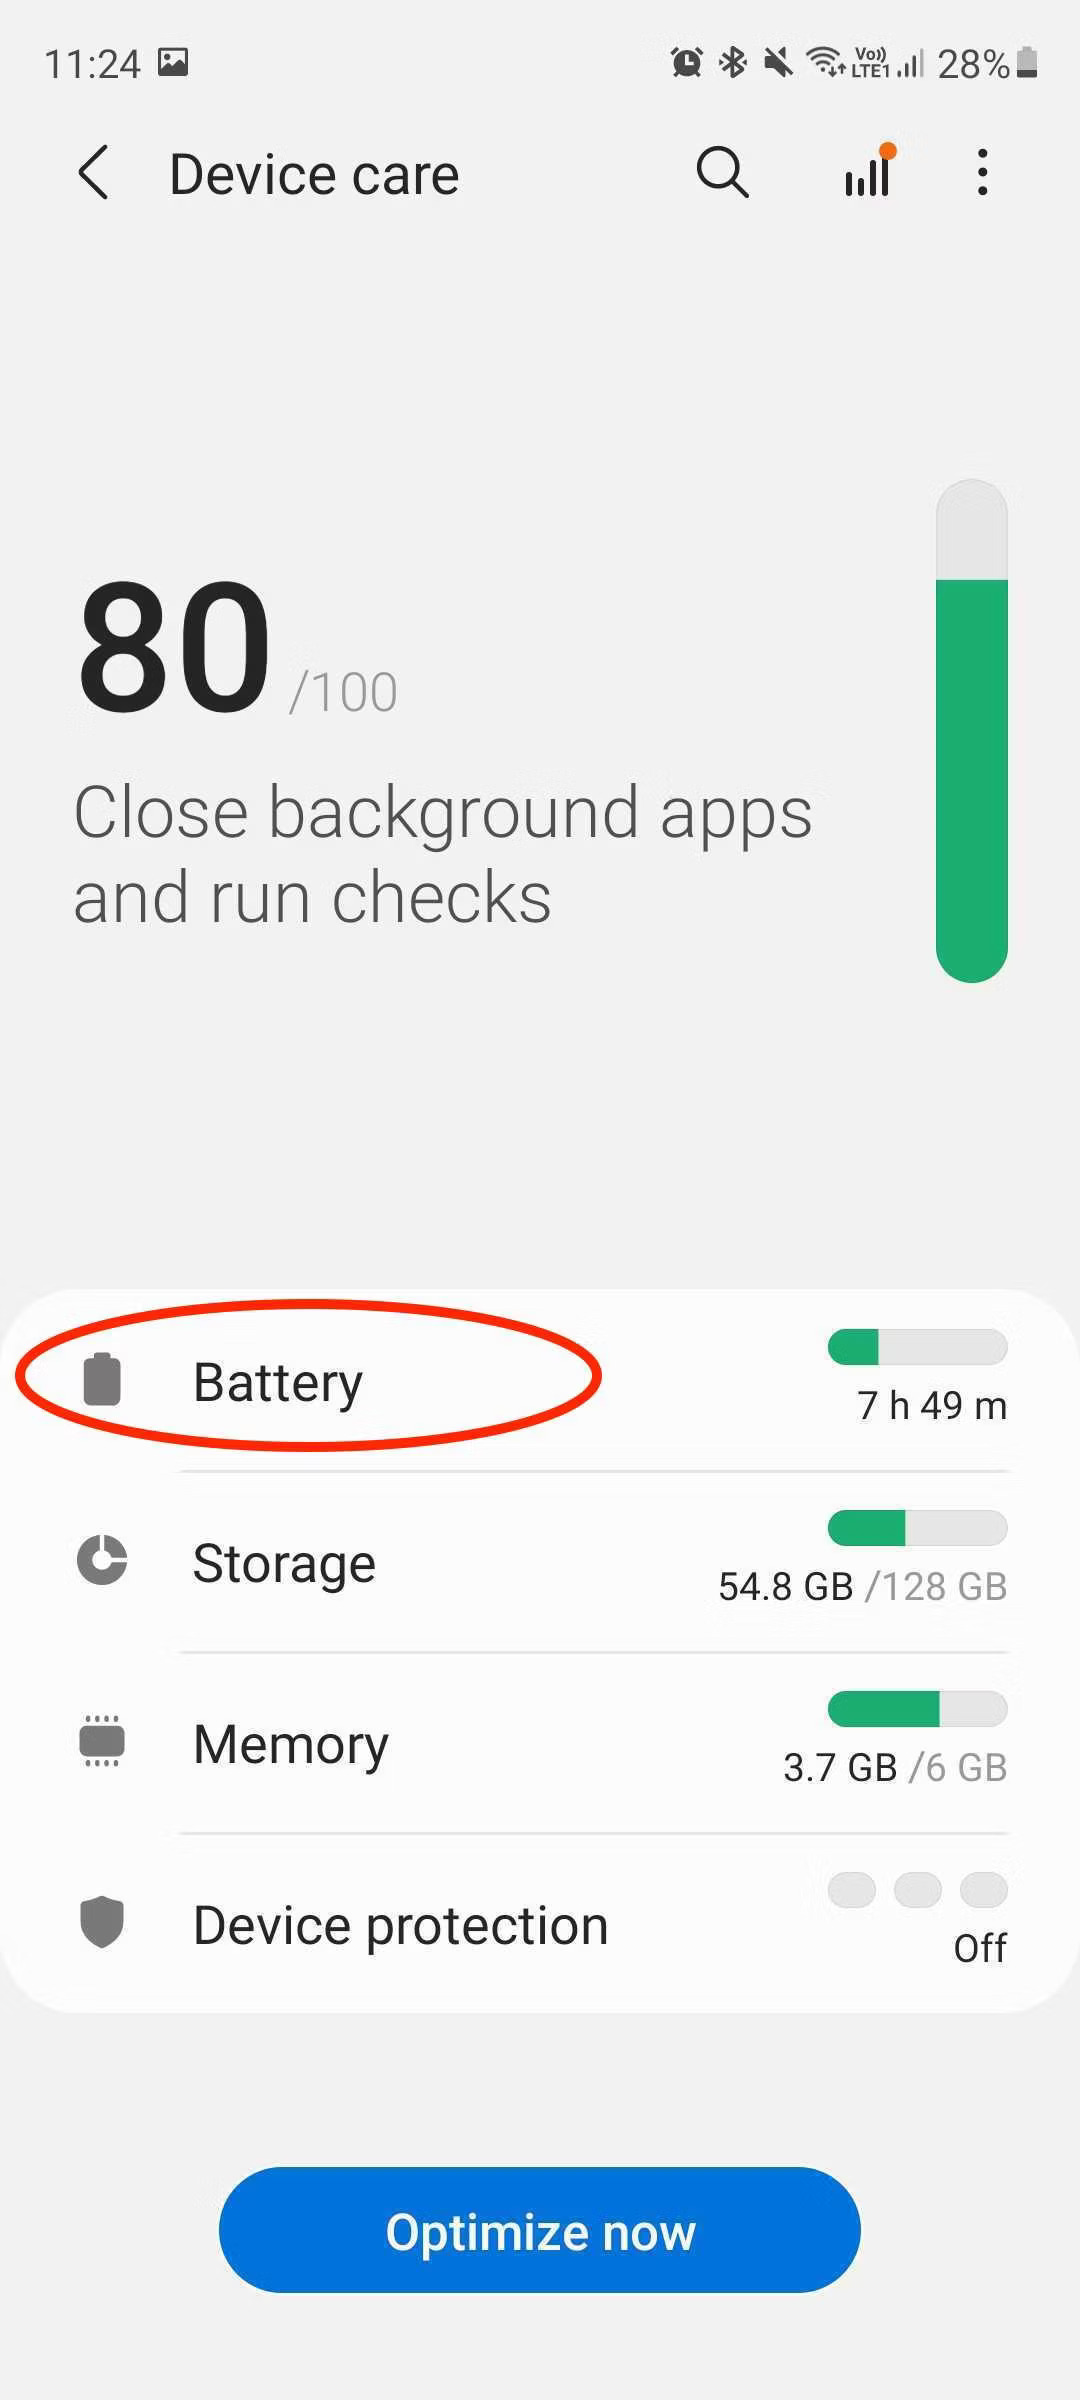
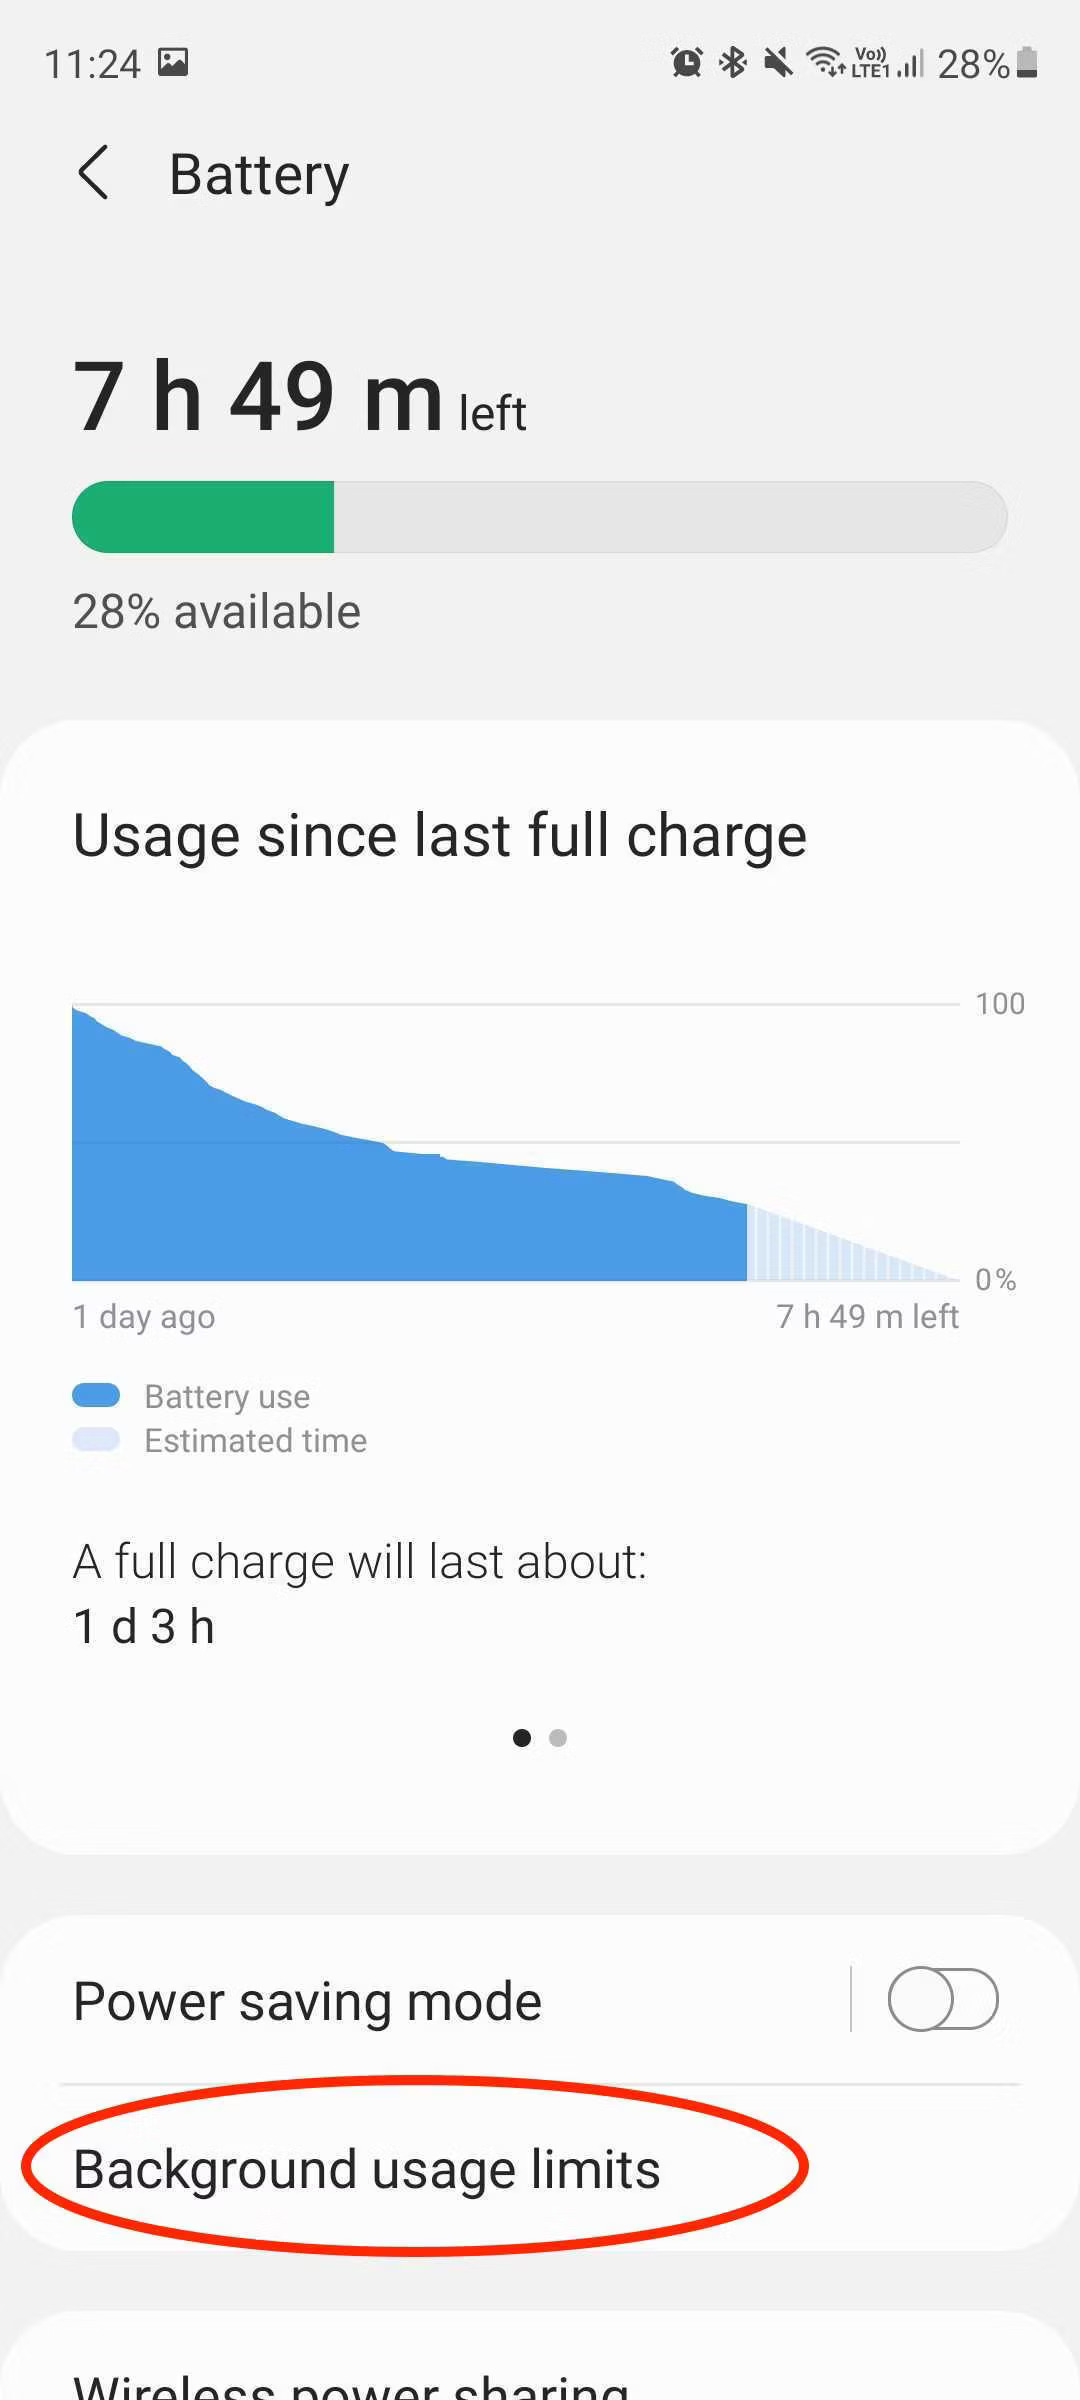
- Once that’s done, you’re going to have to go deep to find Samsung’s controls. Start the Settings app and tap Battery & device care. Then tap Battery. On the Battery page, head to Background usage limits.
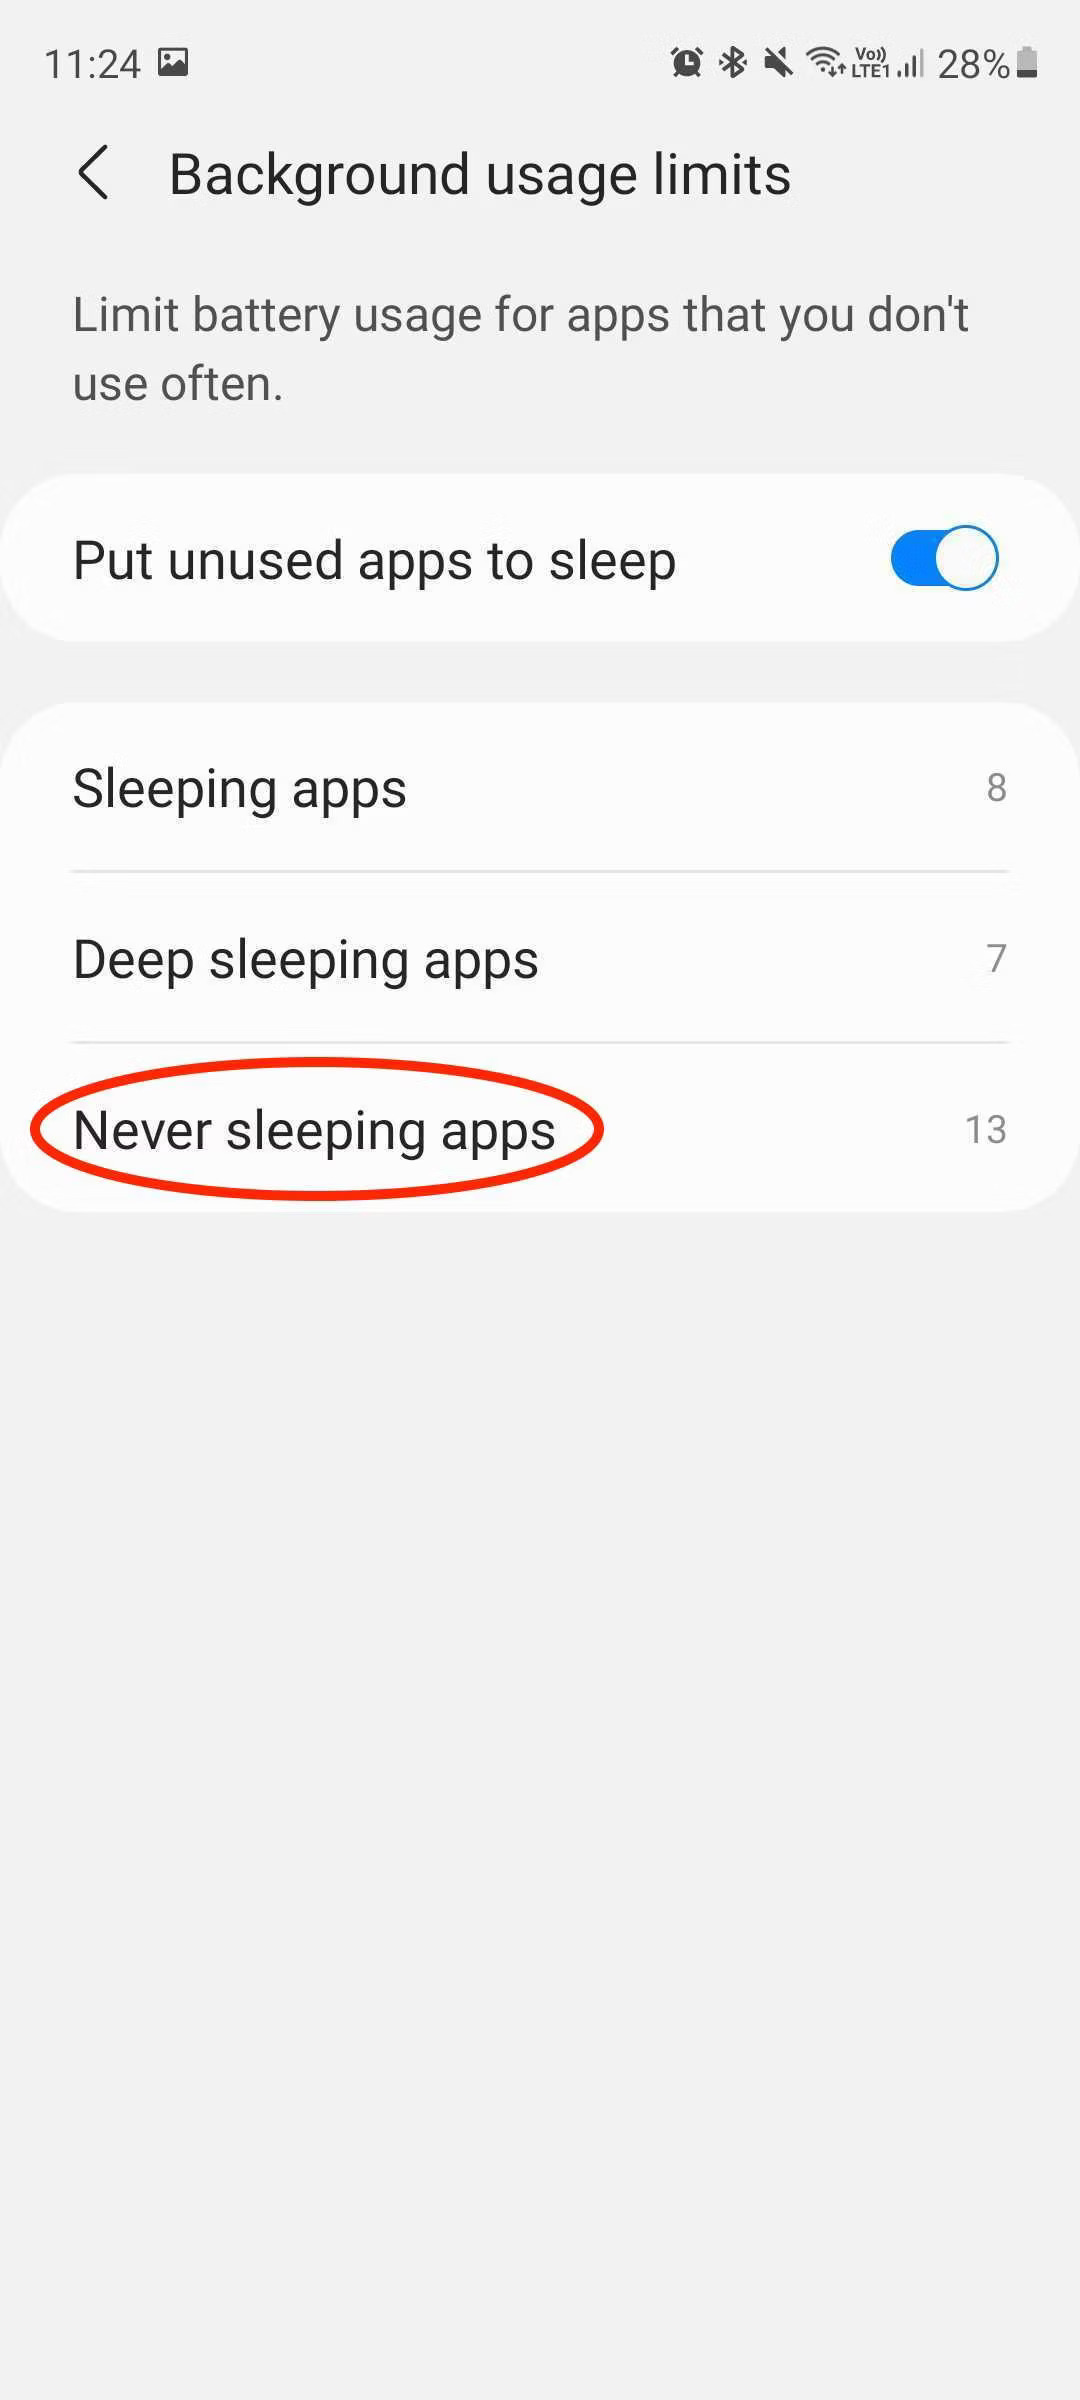
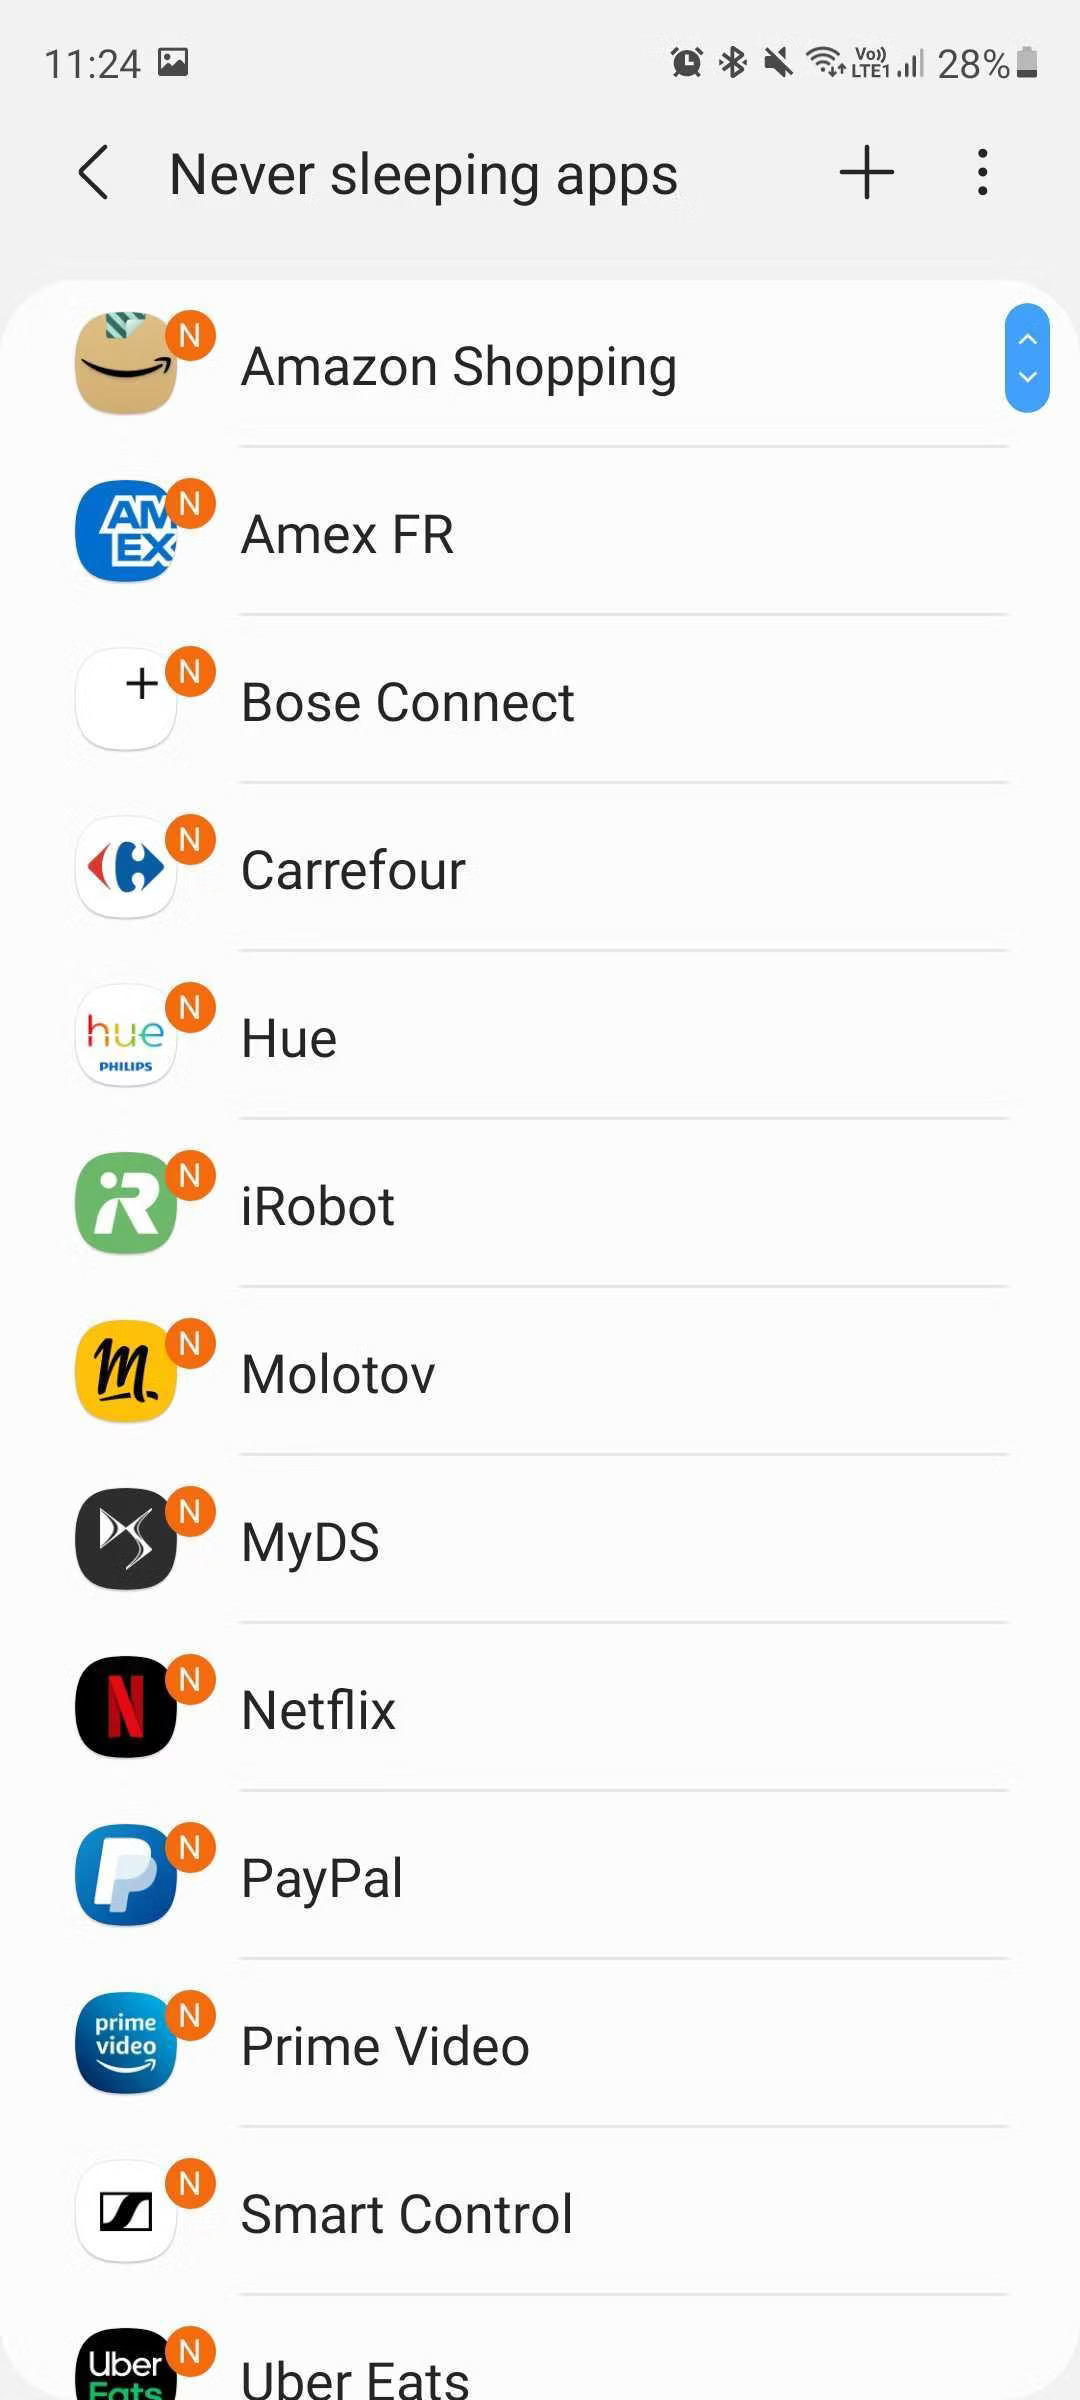
- Here, you’ll find three different lists of apps that have some form of power management enforced on them. To see the list of apps that are allowed to run in the background with as few restrictions as possible, tap Never sleeping apps. You can add additional apps to this list by tapping the plus sign in the top right corner.
Xiaomi
Xiaomi makes things a little more complicated. Just like on Pixel phones, you also have to tap and hold an app icon to tweak its battery management settings, but if you want to make sure that an app really does stay active in the background at all times, you need an extra step.
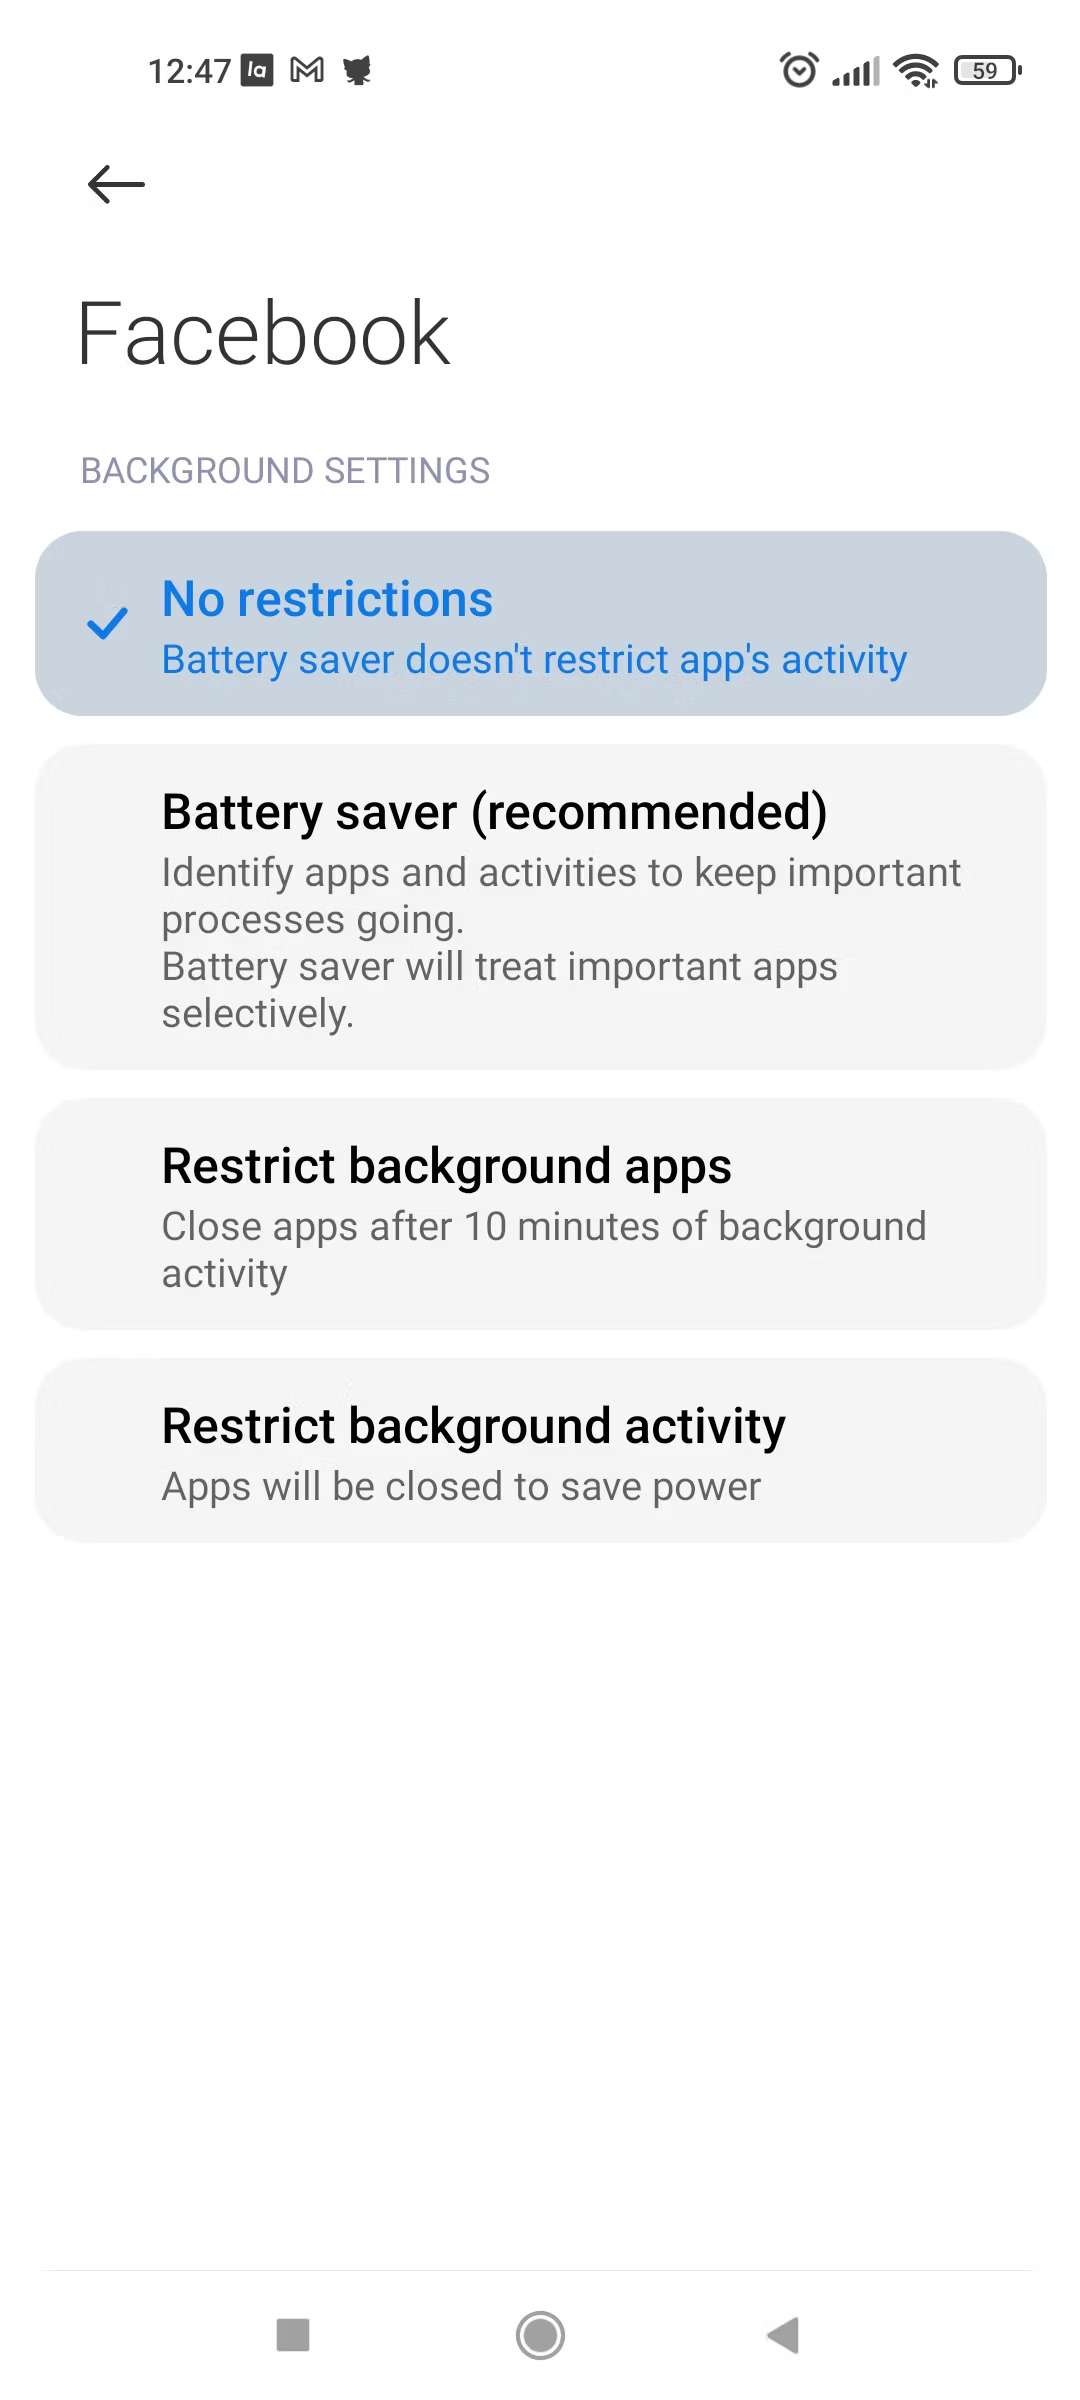
- Follow the steps described in the Pixel section above — things are only labeled slightly differently, as you can see in the screenshots above.
- Once that’s done, open the app you want to keep active and then enter the multitasking overview / app switcher.
- Tap and hold the preview of the app and then choose the first option in the menu, the Lock icon.
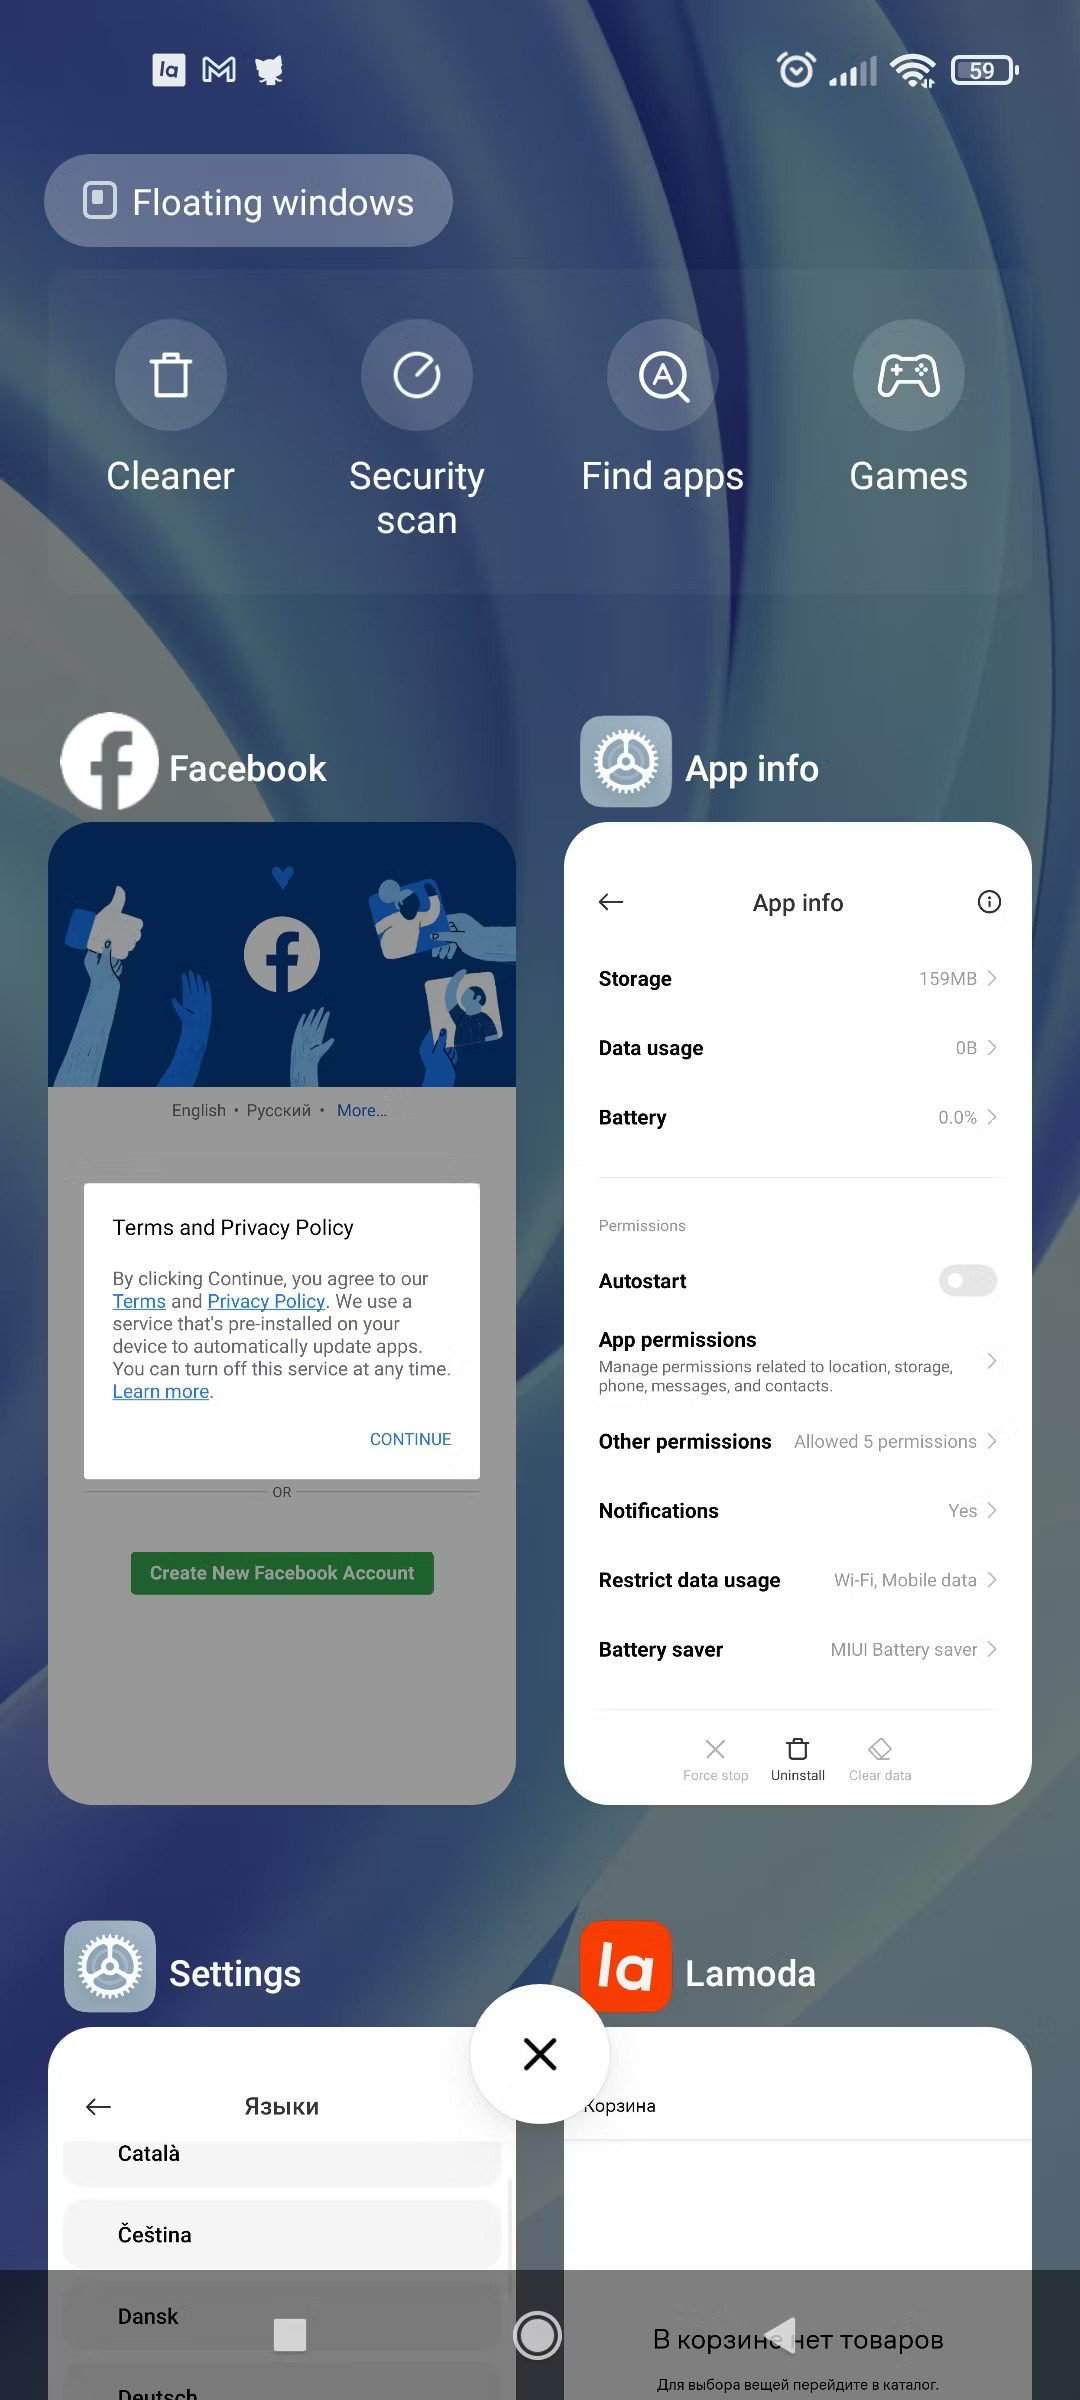
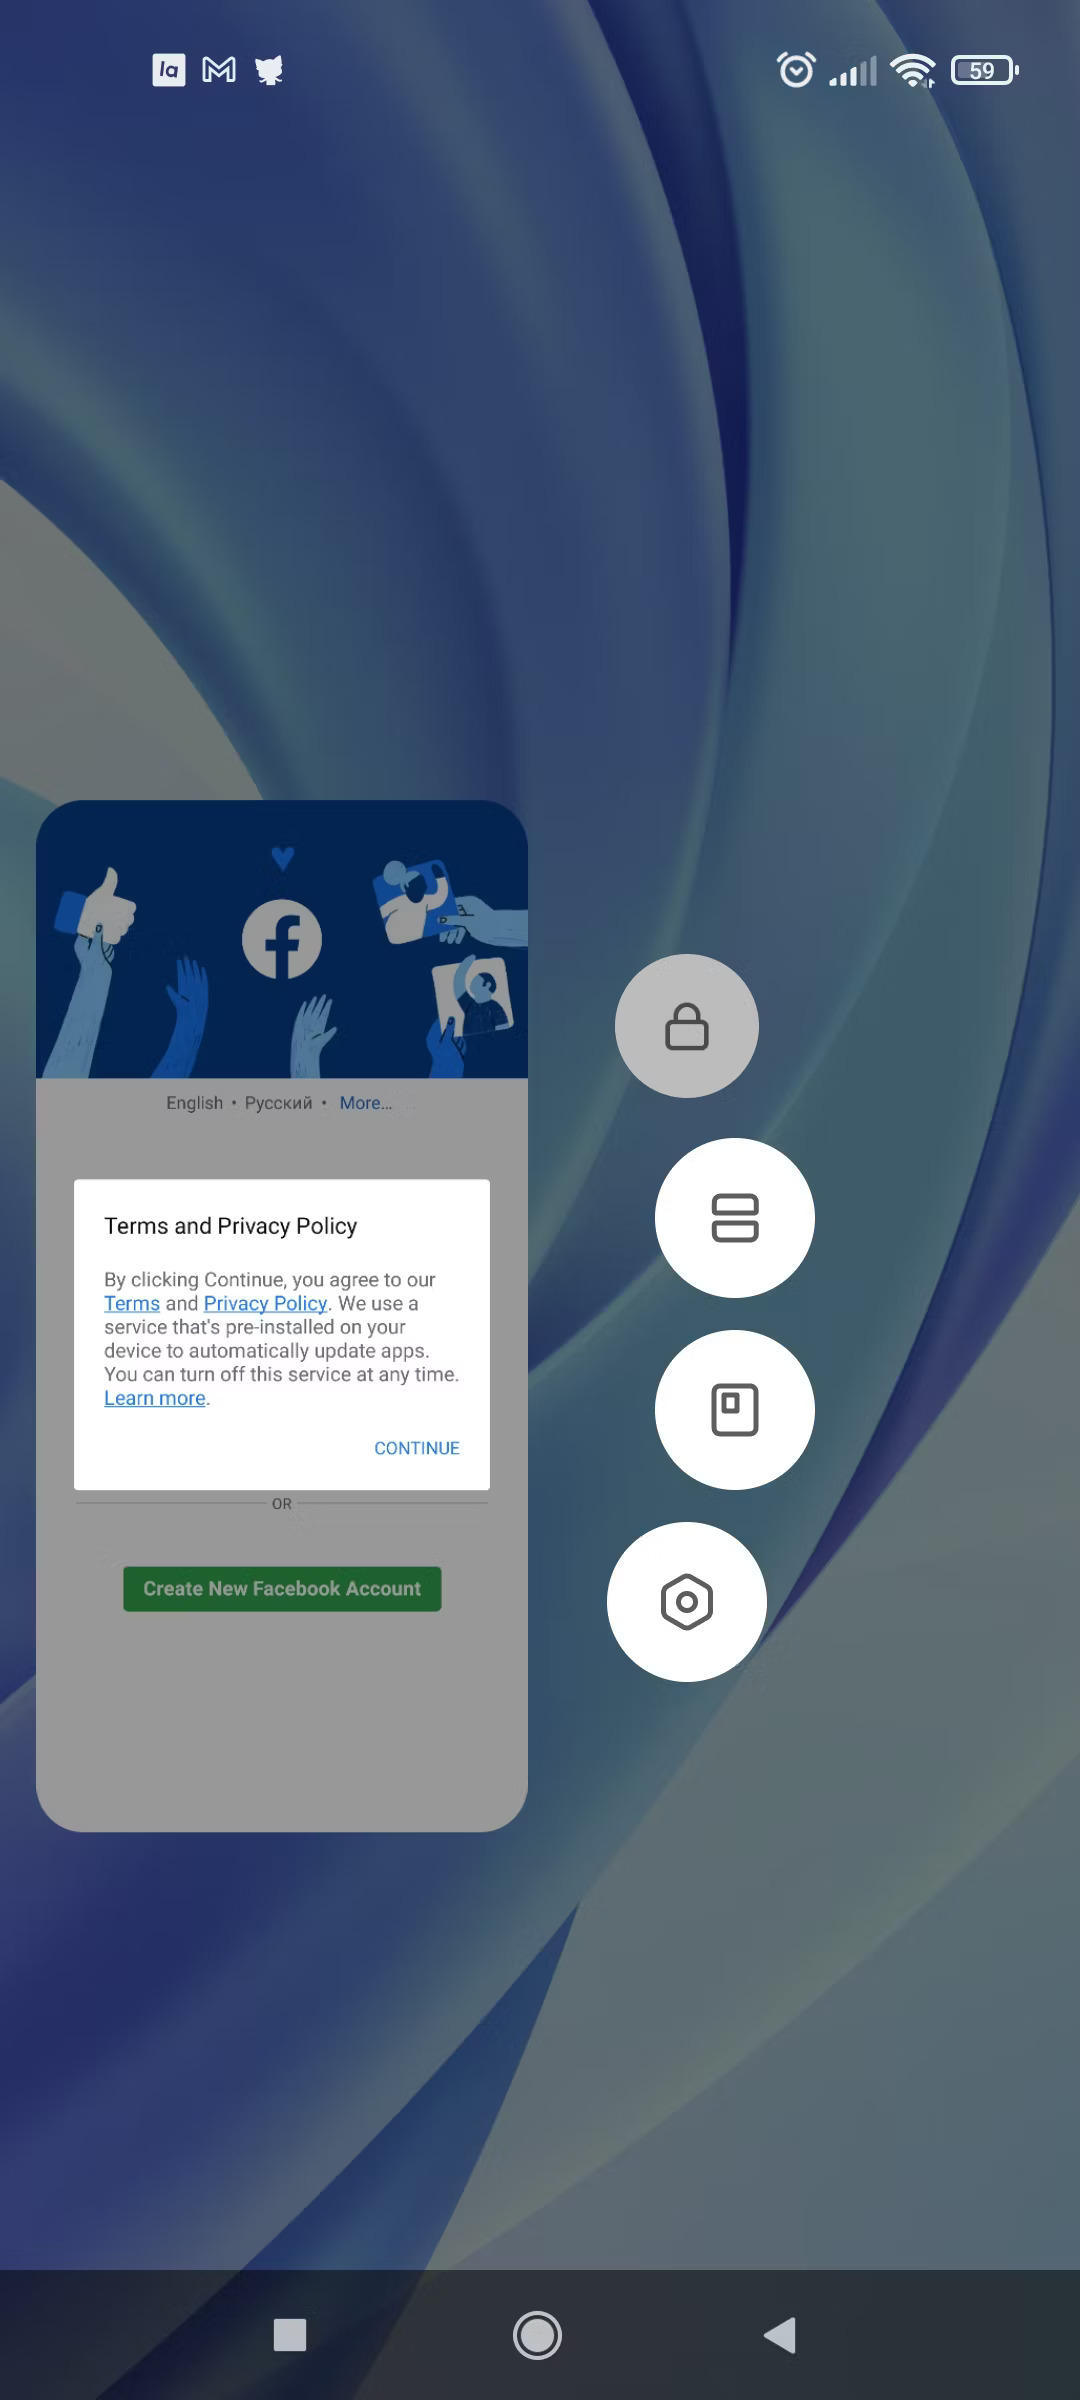
Locking the app like this will ensure that it really does stay active in the background. This step might not be necessary for all apps, but if you keep running into notification issues, it’s worth trying. When it comes to companion apps for accessories like smartwatches and fitness trackers, locking the app in the multitasking overview is vital. It will prevent syncing issues from popping up.
There you have it — once you’ve got everything set up on your phone, you should be getting timely notifications in those apps that just wouldn’t play nicely with Android’s optimizations. Granted, things have improved over recent years, and this workaround isn’t necessary for all apps anymore, but it’s still good to have in case you run into misbehaving applications.